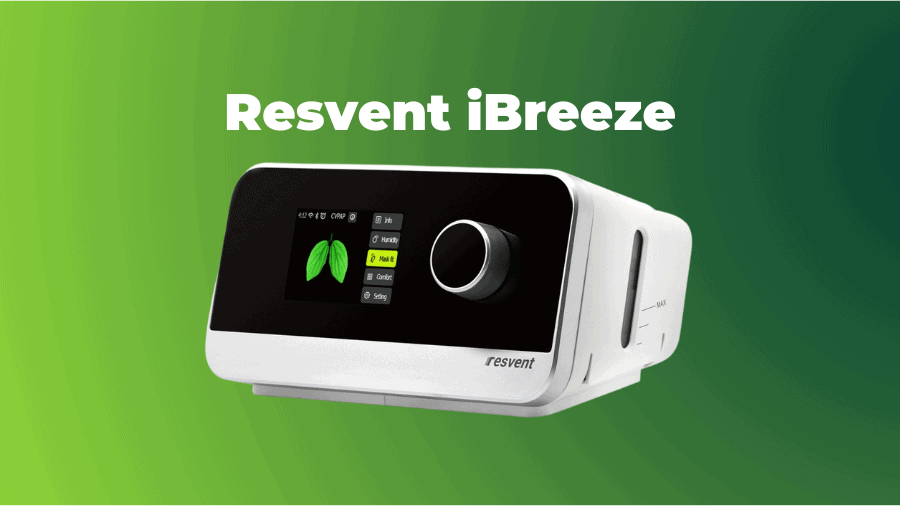
The Resvent iBreeze is a portable, affordable, and smart feature-rich CPAP machine that is easy to use and maintain.
We are going to do a deep dive into the new Resvent iBreeze Auto CPAP machine. This iteration of the machine is newly released, and the more we use this, the more we are sold.
This is a great unit, available at a low cost – with some really nice, easy-to-use functionality. If you’re after a simple CPAP device with lots of intelligent features that make it pretty much ready to use out of the box, then you’re really going to like this iBreeze unit.
We’re going to unbox it, go through the Menu, and talk about some of the smart features on the device. Then, we’ll fire it up and check out how quiet it is (it’s extremely quiet). Let’s get started.
Resvent iBreeze APAP – What’s in the Box
You’ll be pleased to know that the box does in fact contain a shiny new iBreeze device, which is packaged inside a handy travel case, which is great because this device is pretty portable.
It weighs under three and a half pounds, which even includes the integrated humidifier. The case has a handle and shoulder strap and overall feels to be of pretty nice quality.
You’ll also find the power adapter, user manual, an extra (or two?) disposable filter(s), as well as a standard 19mm CPAP tube.
If you have your own slimline 15mm tube that you want to use instead, then that is also compatible with the iBreeze; you just need to adjust the setting in the device Menu, which we’ll talk about in a bit.
You’ll also notice that there is an angled molded plastic with a female tube fitting. This is the Air Outlet Connector, and it needs to be attached to the unit before you remove your humidifier or hook up your hose. In fact, the hose can’t be installed without the connector attached to the unit.
Let’s do that.
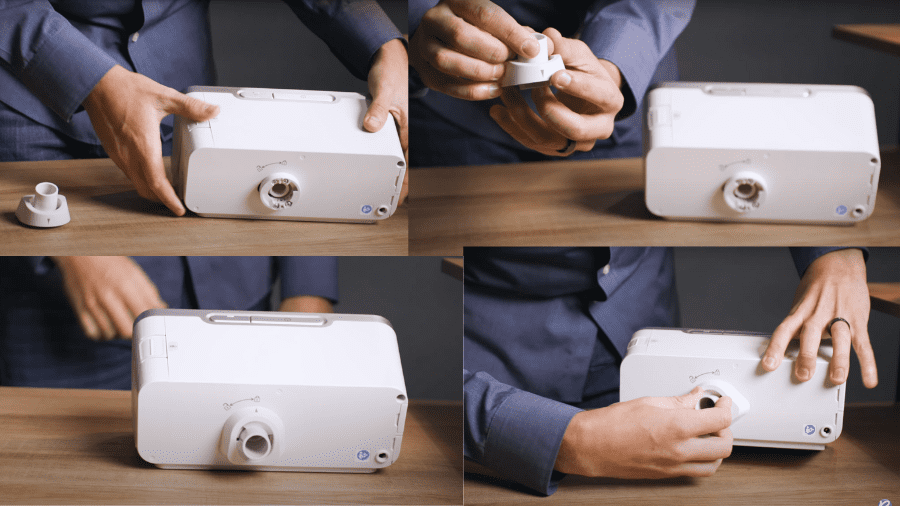
Simply turn the unit so that the rear side is facing you. You’ll notice that there is a small triangle on the connector. Line the triangle up with the unlock icon on the device and then rotate it till it faces the locked icon. You’ll feel it snap into place when you’ve rotated it all the way in.
Resvent iBreeze Features
With the connector now installed, let’s go over some of the features of the unit before we even turn it on.
It is pretty portable – the length is less than 10”, and fits nicely onto a nightstand. Part of the appeal of this unit is its small footprint, and this is achieved in part by having a design where the humidifier is integrated within the device housing itself.
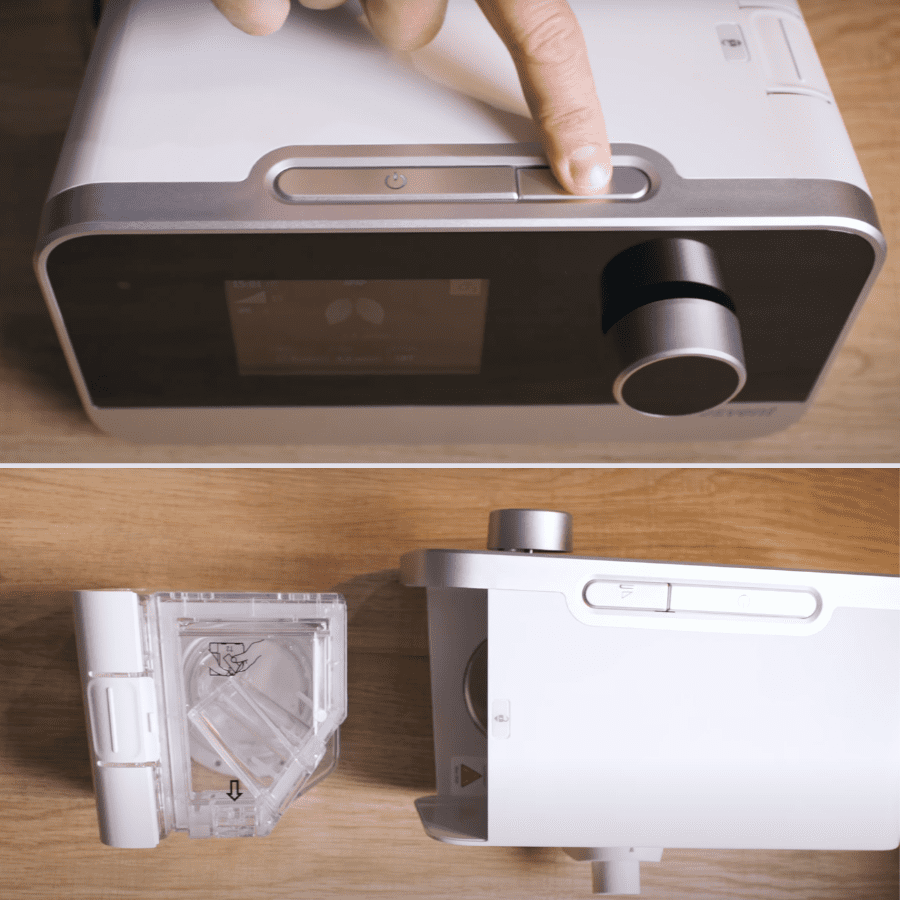
Simply push this button to release the water chamber and slide it out. At this point, you’ll discover whether or not you installed the Air Outlet Connector because if you haven’t, then the water tank gas outlet adapter will fall out of the unit.
Not to worry if so – simply hold it back in place while you install the Air Outlet Connector; then you can remove the water chamber from the unit freely without this happening again.
Once the chamber is out, unlatch the lid to fill or empty it.

You’ll need to refill this unit every night and empty it each morning, and you’ll also want to clean it once a week with mild detergent and water.
As always, fill your humidifier with distilled water – which you can either buy from the store.
With the chamber filled, latch the lid and slide it back into the machine. The humidifier is ready to go.
When you turn the machine around to the other side, you’ll find the magnetic filter latch. Open the latch to insert or remove your filter.
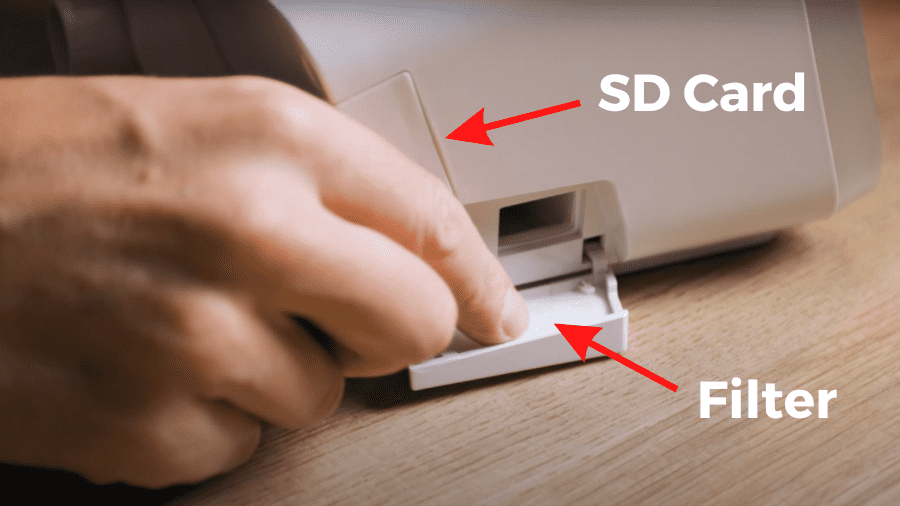
The iBreeze uses disposable filters only, and it is recommended that you change these out every 2-4 weeks, so have a few on hand.
Next to the filter is the SD card slot. Resvent ships these units with an SD card already installed, which is a nice touch. This SD card will record your device usage and sleep patterns.
It stores one year of statistical data and one week of high-resolution data to provide to your physician if needed, or you can go and view the data yourself. To do this or to run reports, you’ll want to download the iMatrix software, which is available on Windows only.
Resvent does offer an app for iPhone and Android – ResAssist – but the experience is currently pretty terrible.
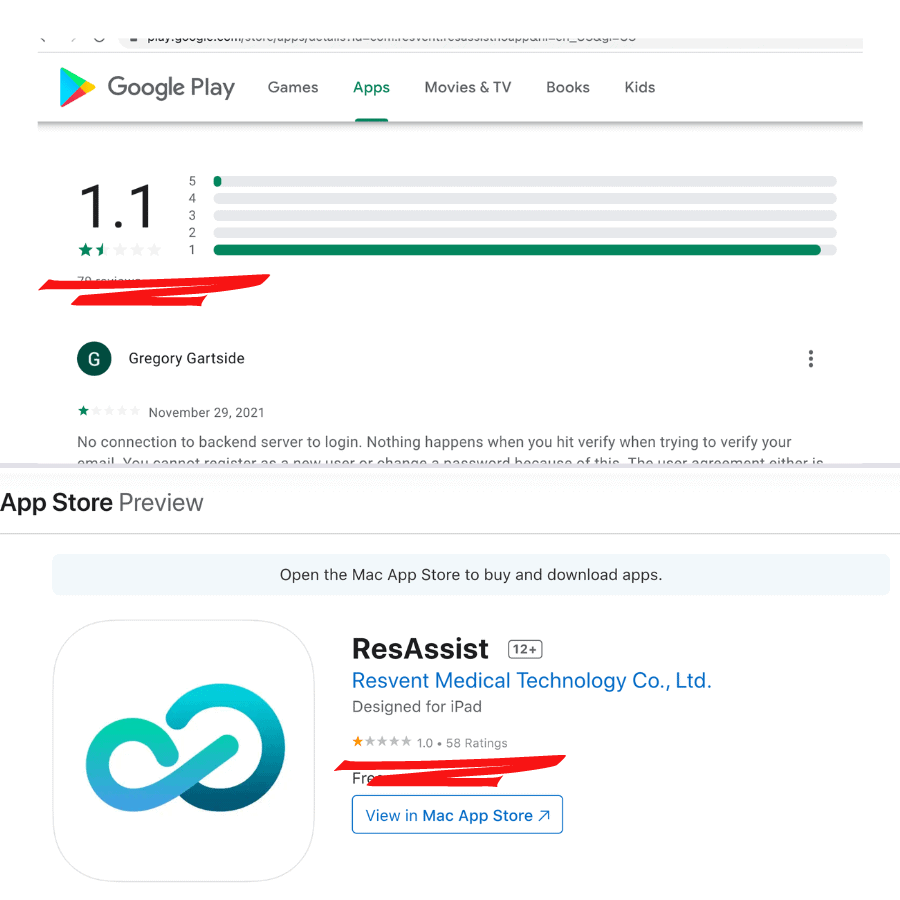
That is a downside for Apple users because there isn’t satisfactory software available for you right now to view your sleep data. But, for everyone else, iMatrix is the way to go.
If you are wondering about the sound abatement foam used on the iBreeze, and if it is the same as what is used by other manufacturers – sleep easy. Resvent uses a green and safe light-density foam that is made of a different material from that used by another well-known manufacturer… wink wink, nudge nudge…
Turning On the Resvent iBreeze
Ok – let’s turn it on! Plug in the power adaptor and press the ON button… the device turns on. See, we told you it was a simple unit!
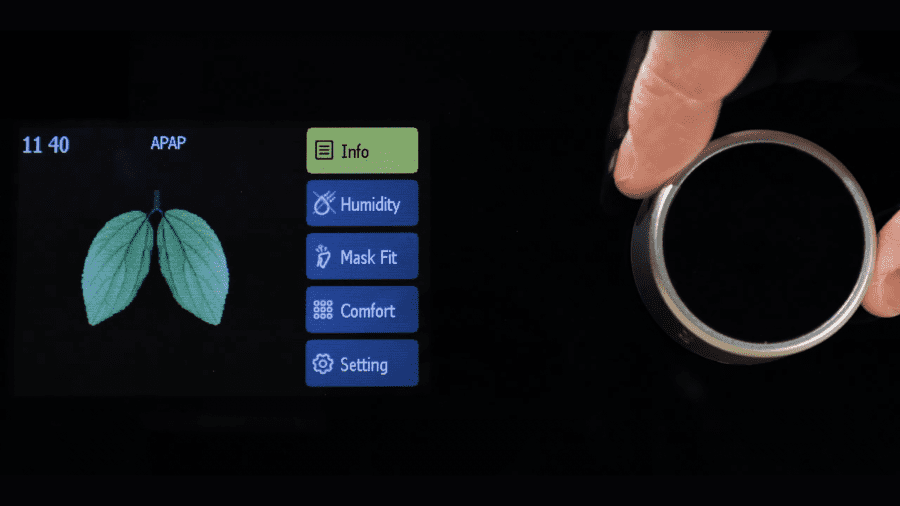
The unit has a nice, bright three-and-a-half-inch screen, which you navigate by rotating the knob and depressing it to make a selection. Let’s go through the menu line by line – it’s pretty self-explanatory, for the most part.
One of the nice features of the iBreeze is that it is simple to use and navigate, so if you are looking for an easy machine, then this is a great choice.
The first option in the menu is the Info screen.
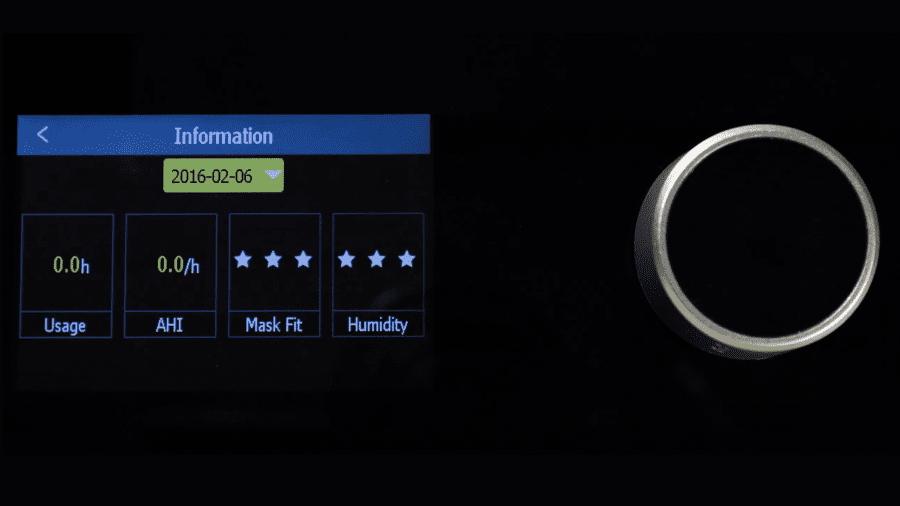
This gives information on Usage, which is the number of hours the device has been running during the period indicated at the top of the screen.
You can also see your AHI or Apnea-Hypopnea Index number, which is the instances of apnea and hypopnea you experience per hour.
You also see your mask fit and humidity on a 3-star rating system. And if you push the knob again, then you get a more detailed view of your usage information and sleep patterns.
Feel free to give us a call and chat with one of our Medical Staff at RespShop if you want more details on any of these numbers or to talk about your therapy.
Whenever you want to go back to the main menu, navigate to the arrow at the top left of the screen. You may need to do this more than once before you reach the root menu.
The next item on the menu is Humidity.
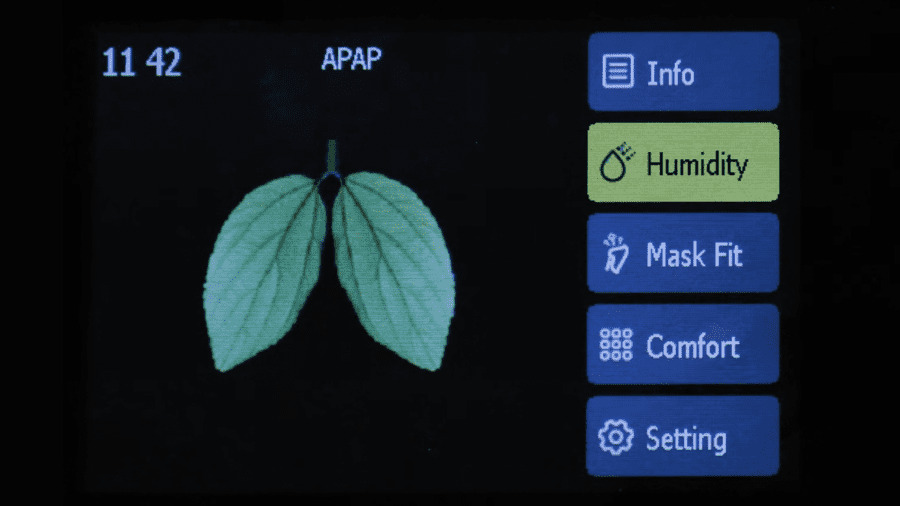
It’s important to note that this menu item is only accessible if there is water in the unit. So, if you try to access the Humidity setting but the cursor is rolling past this option every time, the first thing to check is that there is water in your water chamber.
There is a sensor built into the machine that will detect this, and this sensor can also tell if the water level is low, which, if it is, it will disable the heating feature and alert the user with an alarm to prevent discomfort.
We’ve already filled our chamber with water, so let’s select Humidity – this option allows you to set the humidity level manually, anywhere from OFF – 8, or set it to AUTO. Unless you have a specific reason to do otherwise, I’d recommend keeping this on Auto.
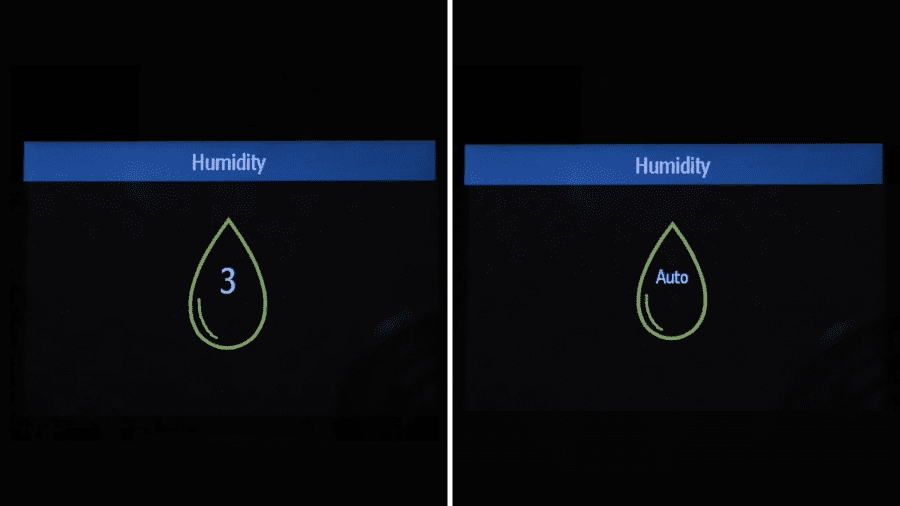
The unit will auto-adjust the humidification based on the room temperature and humidity levels through its inbuilt thermometer and hydrometer and adjust humidification accordingly, which results in less excess water sitting in your tubing, which is a good thing.
Next up is Mask Fit. This is an at-a-glance view of how well your mask is fitted.
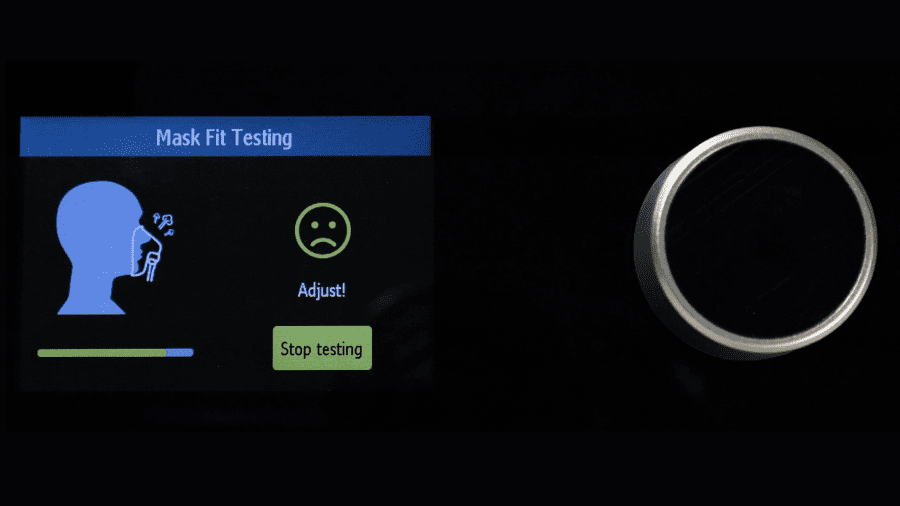
If the seal is good, the device will show the ‘Good’ icon; if there is a break in the seal, then it will show the ‘Adjust’ icon.
The happy 🙂 and sad 🙁 faces really help to solidify the emotions you might be experiencing while doing this!
Comfort is where you’ll find the bulk of the customization that you can do with the machine.
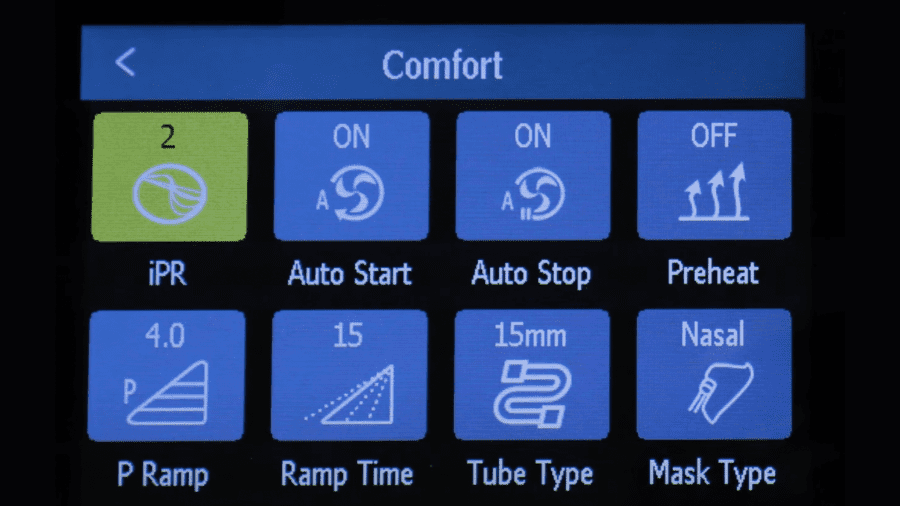
IPR dictates the amount of relief against the pressure you get when exhaling, and there are three settings.
Auto Start indicates whether or not you want the machine to automatically start when you begin breathing through the mask; Auto Stop is the same in reverse.
Next are the options for the Ramping feature. Ramping allows the user to minimize the effect of the machine while they are falling asleep for increased comfort, as you have more control over your breathing patterns while awake.
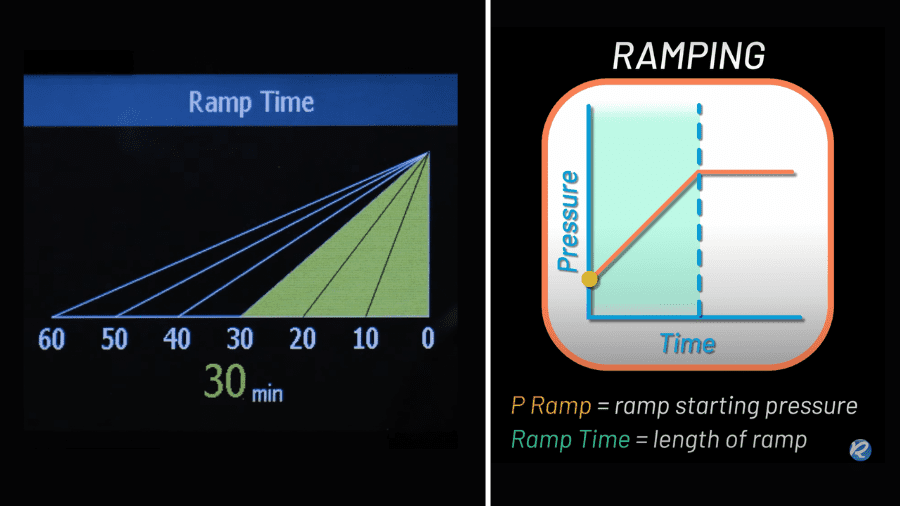
The pressure gradually increases over the set period of time until it reaches the prescribed pressure amount. P Ramp is the ramp starting pressure, and Ramp Time is how long you want that ramping up of pressure to last, in 5 min increments.
Put simply, if you are someone who takes a while to fall asleep or you’ve just watched a movie before bed, then have the Ramp Time set a little higher. If you’re someone who hits the hay and is out like a light, or a Mom of a newborn, then you could probably have this feature completely off and be just fine.
Tube type allows you to select the tube that you have.
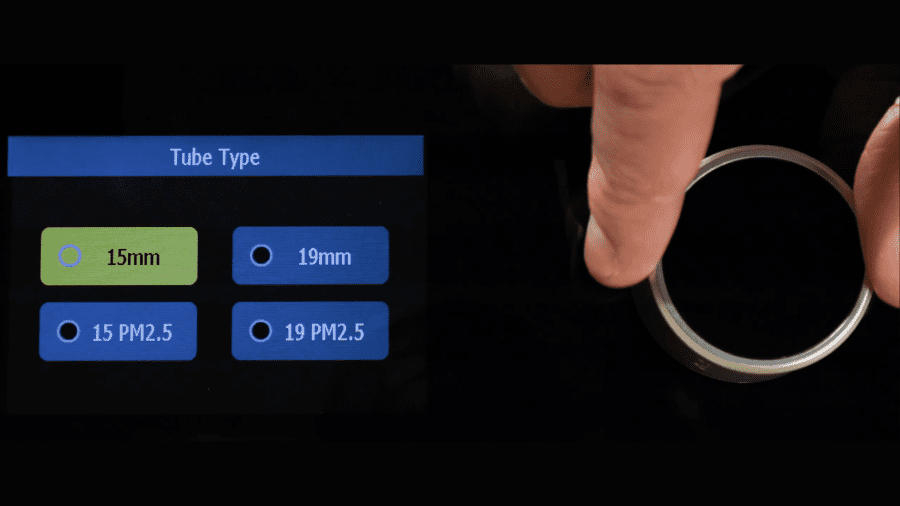
The standard 19mm Healthy Hose, for example, is an antimicrobial hose that prevents and eliminates up to 99.99% of bacteria. And you can choose the appropriate option on the screen.
Mask Type allows you to select the type of mask you have.
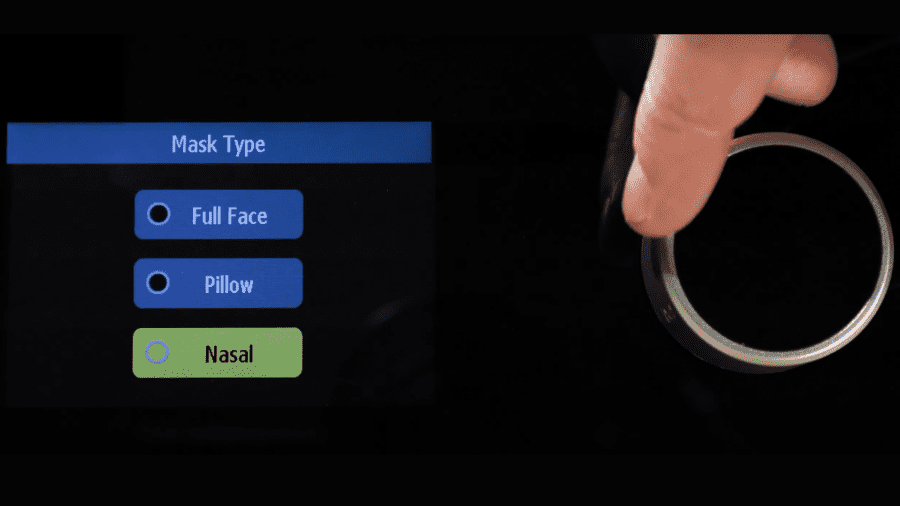
Settings are common generic settings that you can adjust, such as Brightness, Date / Time – which by the way, make sure you have set correctly so that your data records accurately.
But this menu item is rather self-explanatory. You can also set Reminders for when to clean your machine, among others. Again, it’s probably best to either consult the product manual or reach out to our team with questions on any of these settings that you need help with.
Starting Up the Resvent iBreeze
Now, let’s start up the unit – the button is on top of the device. And it is extremely quiet.
The unit has a sound rating of 30dBa, which incidentally is the same loudness rating as a ticking clock or a soft whisper. So, it’s very quiet and is unlikely to disturb your partner if you sleep with someone else in bed.
And after a few minutes of uninterrupted running, the screen will also turn off to prevent any light in the room while sleeping.
Because it is so quiet, it can be difficult to know whether or not the machine is actually running! Just depress the knob, and it will wake up the screen if you want to double-check at any point.
The other information on the screen includes the range of pressure that the machine will operate within once the ramp cycle is over by displaying the maximum and minimum unit pressure.
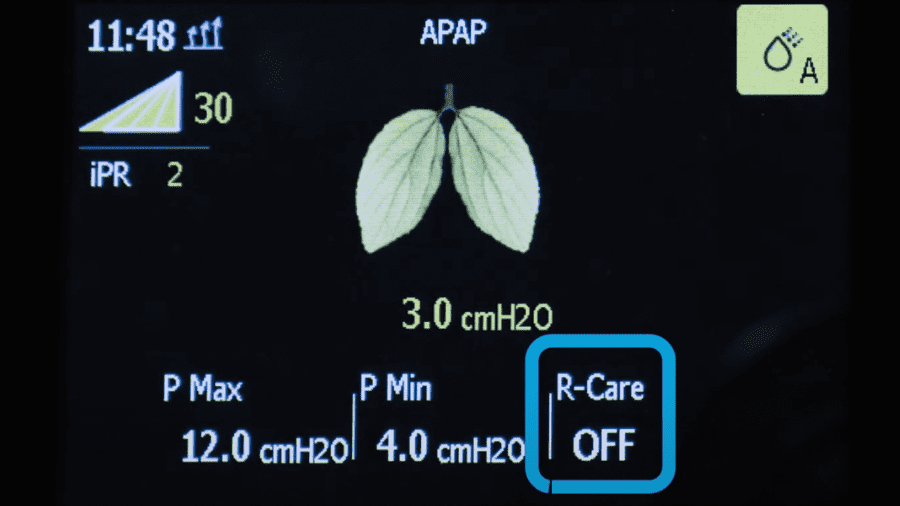
You’ll also notice that this R Care setting is either On or Off. This is a comfort setting that allows new users to get accustomed to using a sleep therapy device and can only be changed in the Provider Menu of the unit. You can leave this as is unless you have a specific need to change it, in which case you can give us a call.
The last button on the iBreeze is the Ramp button, which is on top of the unit. Pressing this sends the unit back into a ramp cycle. So, if you wake up in the night and want less pressure as you go back to sleep, then you can press this button to help with that.
Concluding Thoughts
And that’s it! Overall, we really like the Resvent iBreeze Auto CPAP machine. It is a really easy-to-use unit that:
- Offers simple navigation
- Has a collection of nice automation features so users new to sleep therapy can have a great experience out of the box
- Is cost-effective.
This makes a great primary APAP or secondary machine. As always, we recommend having two machines in case you ever have an issue with one of your units. You don’t want to lose sleep while your primary one is out of action.
This is a great way for Resvent to kick off 2022 with a solid unit that comes with a 2-year warranty, and right now respshop.com has it on a pretty sweet intro pricing.
Well, that about does it for us. If you want to chat about what we covered today, then give us a call, or visit our site, and wherever you are – sleep tight!

