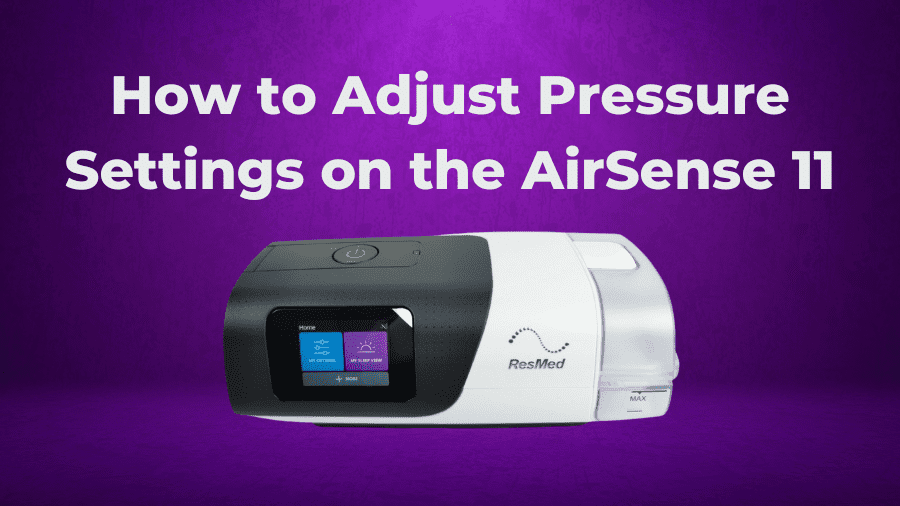
In this guide, we are going to walk you through the settings of the AirSense 11 so that you can change your pressure settings, the unit ramping, and much more.
If you own an AirSense 11 and have been wondering what a certain setting does or how to change an aspect of the CPAP, then you’ve come to the right place. This guide will walk you through adjusting CPAP pressure setting as well as comfort settings such as ramp and expiratory pressure relief (EPR). After reading this, you’ll be able to fine-tune your ResMed AirSense 11 to your personal comfort.
If you’re looking for more information about the latest ResMed CPAP machine, we have a detailed AirSense 11 review that delves into its key features, pros, and cons. Make sure to give that a read!
How to Change ResMed AirSense 11 Pressure Settings
Let’s start with adjusting the pressure settings. A little disclaimer here – always consult with your doctor before changing these settings. You can also talk with one of our medical staff here at RespShop.
If you are new to CPAP, then you don’t want to mess with this setting as you are changing your prescribed sleep therapy, which you only want to do after speaking with your doctor.
So, again, make sure you know what you are doing before you change this setting. But with all that said and understood, this is how you do it.
From the home screen, press and hold the My Options and My Sleep View buttons for about 3 seconds, and the menu background will turn white, the buttons will change, and at the top, it will say Clinical Home.
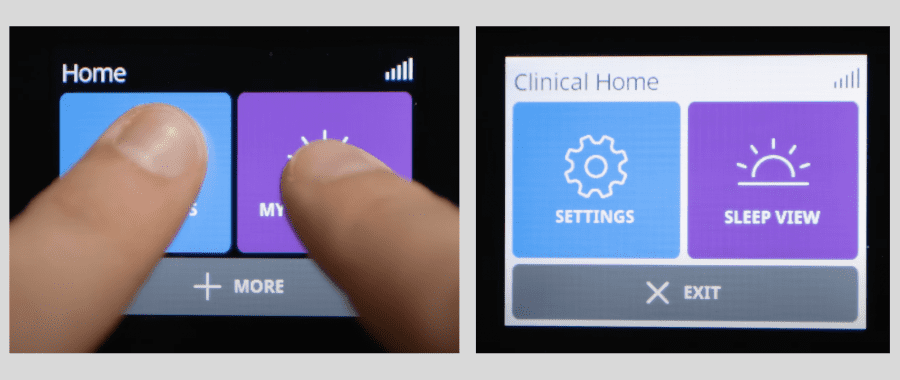
You are now inside the device’s Clinical menu, which has a lot more options than the standard Patient menu.
Click Settings, and then if you have the AutoSet model of the AirSense 11, you’ll be able to change your Mode here.
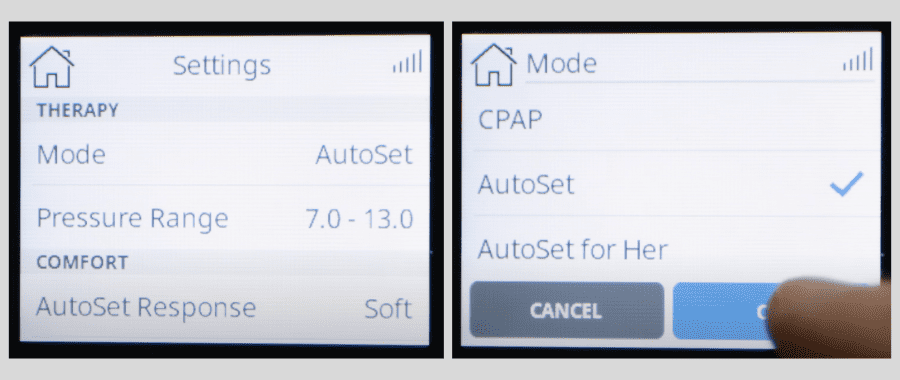
When on AutoSet or AutoSet for Her, then you can change the Pressure Range by independently selecting the Minimum Pressure and then the Maximum Pressure.
Or if you have the basic CPAP model, or have set your AutoSet unit to CPAP mode, then instead you will select the single continuous pressure that the unit will deliver.
Within either mode, you can also dial in the pressure to the 10th degree by selecting the .0 button in the corner of the Pressure setting.
How to Change Ramp and Other Comfort Settings
Next, we’ll adjust the ramp settings. Ramp can be accessed in the Patient menu under My Options, but the options here are limited. To get full control of the settings, access the Clinical menu by pressing and holding the My Options and My Sleep View buttons from the home screen for about 3 seconds.
Then click Settings and scroll to the Comfort section.
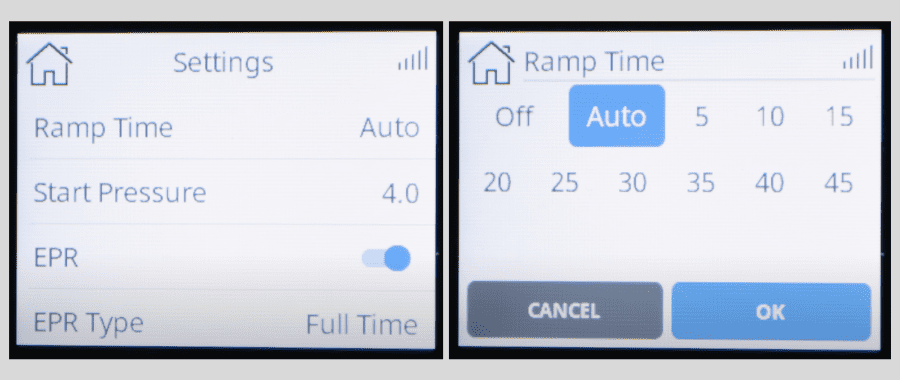
Here you can adjust the Ramp Time in 5-minute increments, turn off the Ramping feature, or set it to Auto.
You can also adjust the Start Pressure of your ramping, which will only allow you to select a number lower or equal to the lowest number of your prescribed Pressure Range.
Below that you can turn the EPR mode on or off. EPR stands for Expiratory Pressure Relief. When on, it lowers the device pressure when you exhale, making it easier to breathe out.
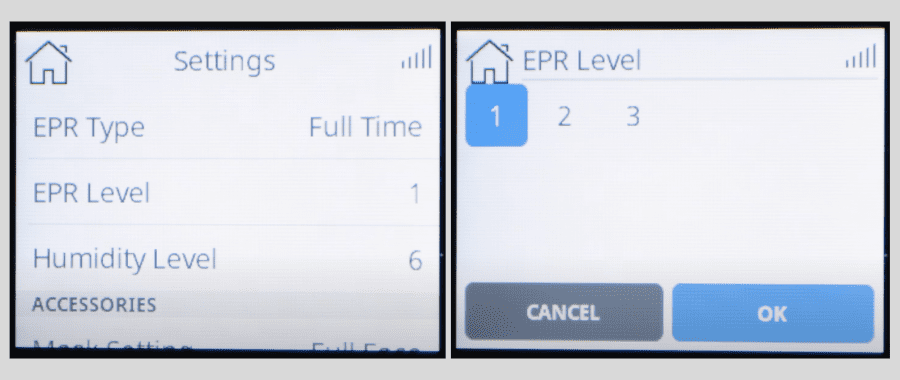
You can set the severity of the pressure drop by changing the EPR Level, so you can experiment to see what is most comfortable for you.
This is one of those settings that’s mostly about what feels good to you. So, we would recommend that you tweak the level until you are most comfortable. Then, as your body gets more accustomed to the therapy, you can always change the amount of pressure drop-off at a later date.
Climate Control and Tube Temperature Settings
You may have purchased the ClimateLineAir 11 heated tubing, which is roughly a $40 extra charge in addition to the unit cost and is well worth it. If you do have the heated tubing, then here is where you’d also be able to change the Climate Control and Tube Temperature settings.
These options are pretty straightforward. The Climate Control setting is either set to Manual or Auto.
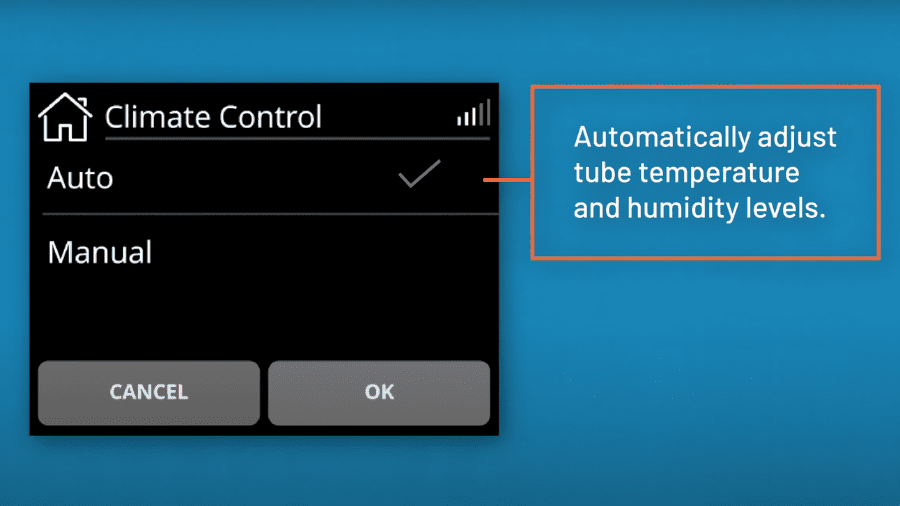
When on Auto, the device will automatically adjust the Tube Temperature and Humidity levels based on the environment in which you use the device in.
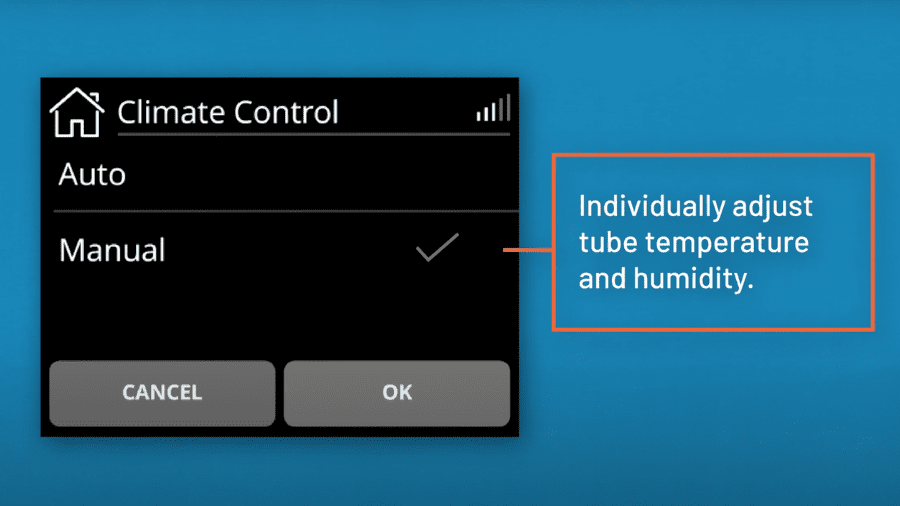
When set to Manual, you can then dial these in individually.
If Climate Control is set to manual, then you can change the Tube Temperature setting anywhere from 60-86°F or turn it off completely.
Humidity Level dictates how much the humidifier moistens the air before it enters your airway and is designed to make therapy more comfortable; hence it’s within the Comfort settings.
If Climate Control is set to Auto, then the device uses its inbuilt hydrometer to ensure that the air is kept at a consistent 85% of relative humidity for maximum comfort. Of course, if you didn’t purchase the ClimateLineAir 11, then there’s no way to turn the Climate Control to Auto, so you’ll need to set the Humidity level manually.
Or, you might find that 85% relative humidity is not the optimal setting for you, in which case you can adjust the Humidity level as needed manually. But because the Humidity Level setting uses a setting of simply 1-8 or Off, there’s no way to know exactly the relative humidity that the air will be at each setting.
The rule of thumb here is that if you’re getting a dry nose or mouth, then turn up the humidity level, but if you are getting moisture in your mask then turn it down.
How to Change Mask and Tube Settings
This can be accessed through either the Patient or Clinical menu. Let’s turn on the Clinical menu once more as this gives one extra option under the Accessories tab, which is where you’ll find the Mask and Tube settings.
So, once again, press and hold the My Options and My Sleep View buttons from the home screen for about 3 seconds. You are then in the Clinical menu. Select Settings and scroll to where it says Accessories.
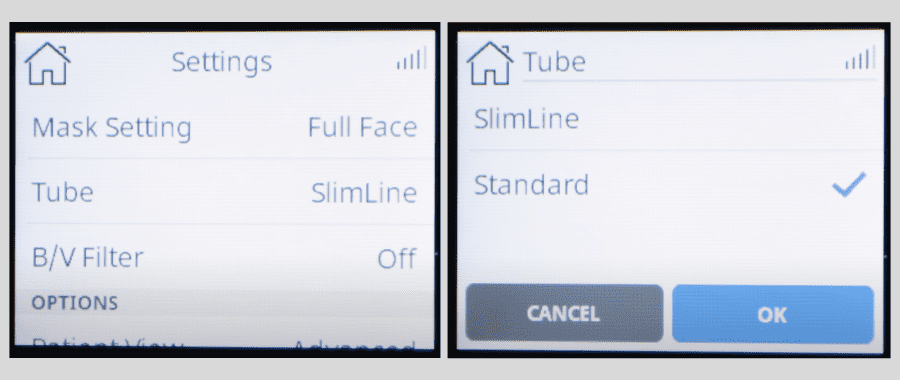
Mask Setting is where you can adjust what type of mask you are using. The Tube is where you select whether you are using a Slimline or Standard tubing.
Unless you’ve paid extra for the ClimateLineAir 11 heated tubing, the AirSense 11 comes with SlimLine non-heated tubing. So, if you are using the default tube that you received with the unit, then make sure this is set to SlimLine.
If you are using another tube, and you are unsure whether it is Standard or SlimLine, then give us a call. We have respiratory therapists, and polysomnographic techs on staff to assist at no cost to you.
B/V Filter is where you select whether or not you are using a Bacterial/Viral filter. Unless you specifically know that you are then you are most probably not!
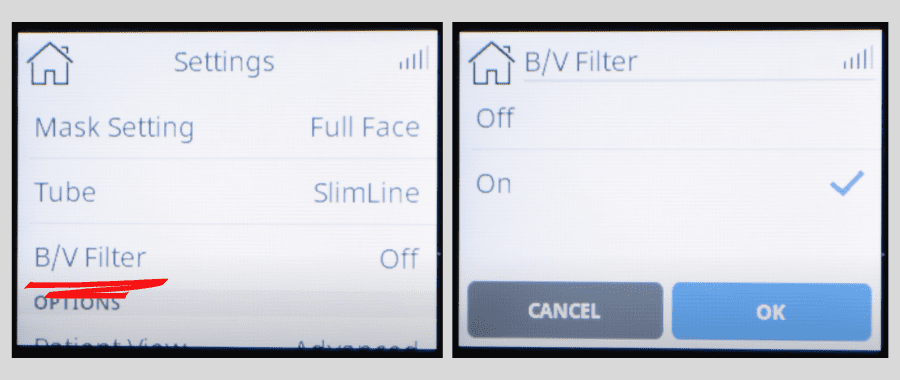
*The standard disposable filters that ship with the AirSense 11 are air filters that captures dust and other large airborne particles. They are not bacterial/viral filters.
How to Change Other Settings of Note
Let’s take a look at some of the other settings that you might want to access. These are settings that can be accessed outside of the Clinical menu, for the most part. However, there is one caveat to that.
Within the Clinical Menu, you are able to select how many Settings can be accessed through the Patient Menu. This is a way of giving limited options to those new to a sleep therapy device so that settings aren’t changed accidentally or otherwise in a way that would negatively impact the efficacy of the therapy.
So, let’s quickly make sure you can access these Settings by changing the Patient View to Advanced mode.
To do this, press and hold the My Options and My Sleep View buttons for 3 seconds from the home screen. Then press Settings.
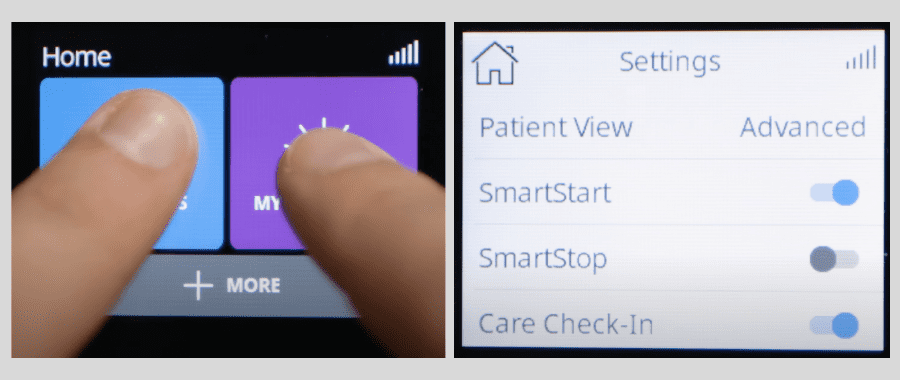
Scroll to the Options tab and click on Patient View and make sure it is set to Advanced. Then press the home button.
Now you can Exit out of the Clinical menu and go to My Options where you can now access more of the device settings, even if not as much as from the Clinical menu.
Other options that we haven’t yet covered are the ability to turn the SmartStart and SmartStop settings on or off. SmartStart automatically turns the device on when the mask is fitted, and SmartStop will do the reverse.
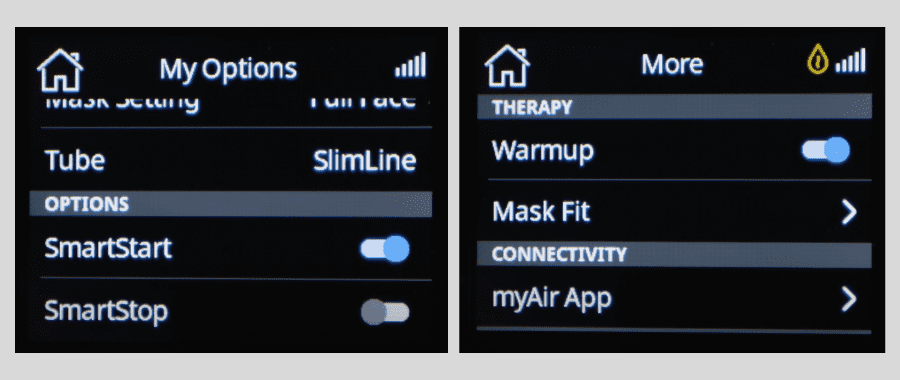
This is great if you need to remove the mask during the night to use the restroom without having to manually turn the unit on and off.
Other settings of note can be accessed through the More button from the Patient menu home screen.
Here you can turn on the Warmup feature, which will begin heating your humidifier before you start your therapy, which can be nice on cold evenings or when you are feeling unwell and don’t want to be inhaling cold air while you wait for the device to heat up once therapy has begun.
Mask Fit will run a test to ensure that your mask seal is good. If you’re having issues with mask leak, we have some tips to help you improve CPAP mask seal.
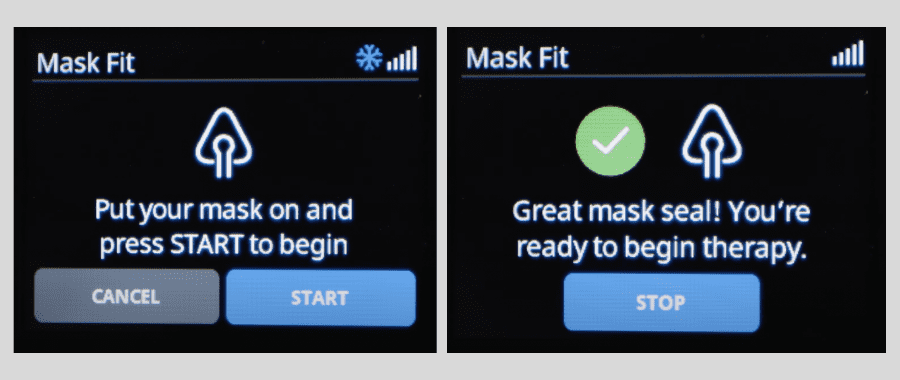
Select this and then press Start once you are wearing your mask as you will be during therapy. The unit will push air through the tube and indicate whether your mask seal is good or needs adjusting.
In this menu, you can also turn on Airplane mode if you intend to take this device traveling.
And that about covers almost everything that you would want access to on the AirSense 11. We’ve covered the vast majority of settings you might want to adjust.
But if there are other settings that you need help with, or want to discuss anything we’ve covered today in further detail then give us a call. If you want to take a closer look at the AirSense 11 then check out our detailed review of the unit.
We’re here to help, so if you have any questions whatsoever, then give us a call or visit our site for all your CPAP needs, and wherever you are, sleep tight!

