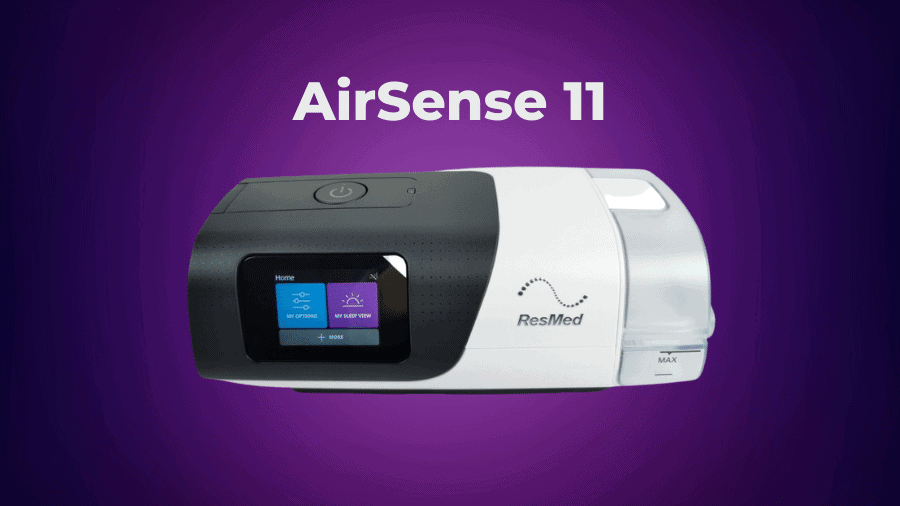
The ResMed AirSense 11 CPAP is a modern, sleek-looking, and highly capable successor to the AirSense 10. With a full touch screen, automatic software upgrades, high connectivity, and the AutoSet option, it is likely to become your next favorite CPAP.
The Three Models of ResMed AirSense 11
The AirSense 11 series includes three models – basic CPAP, Elite, and AutoSet. In this review, we’ll be focusing on the features common to all three models so you could get a comprehensive idea of the AirSense 11 as a machine.
That said, the features the AutoSet model offers make ResMed (and the AirSense 11) the market leader, and we’ll talk about them in detail, as well. Below is an at-a-glance chart for a quick overview of the three AirSense 11 unit types.
ResMed AirSense 11 Basic, Elite, & AutoSet Feature Comparison Chart
| AirSense 11 AutoSet | AirSense 11 Elite | AirSense 11 Basic | |
| AutoRamp with sleep onset detection | Yes | Yes | Yes |
| Easy-Breathe waveform with EPR | Yes | Yes | Yes |
| CSA, RERA, and CSR detection | Yes | Yes | No |
| AutoSet algorithm | Yes | No | No |
| AutoSet For Her | Yes | No | No |
| AutoSet Response comfort setting | Yes | No | No |
| Detailed data on SD card | Yes | Yes | No |
| Touch Screen | Yes | Yes | Yes |
| Personal Therapy Assistant via myAir | Yes | Yes | Yes |
| Care Check-In | Yes | Yes | Yes |
| Cellular & Bluetooth connectivity | Yes | Yes | Yes |
| Over-the-air software updates | Yes | Yes | Yes |
As you can see in the chart, all three models of the AirSense 11 series offer an array of features that have made this machine a huge hit with CPAP users.
It’s only the in-menu options that differ among the three models. The physics and aesthetics – apart from the printed model names, of course – are all exactly the same, as well as all the accessories and their functionality.
ResMed AirSense 11 Design and Aesthetics
In our opinion, this is the best-looking CPAP device on the market by a country mile. It’s almost like they’ve used Apple devices as their inspiration here – with its simple grayscale housing in a contrast with a bright, colored screen to make the screen really pop.

The curved edges and elongated body make it look less squat and awkward than the AirSense 10. And there’s a consistent branding theme throughout with small circles from the ResMed logo found everywhere on the unit and in their marketing material.
So overall, the looks are great – it’ll look good on your nightstand for sure – and it’s nice to have an electronic device that has a modern design when spending this kind of money (which we can’t say the same for some other CPAPs).
Throughout the housing, there are lots of different textures, too, which is nice. You have grooved ends, inset circles, and the Stop/Start button has that rubberized plastic feel, as does the entire base of the unit. That is great because it means that it won’t slide around on your nightstand.
The injection-molded humidifier tub is made of a coarser, frosted plastic with a silicon seal and feels nice, but it is quite thin when you compare it to the plastic on, say, the iBreeze humidifier. I’d be very careful not to drop this unit.
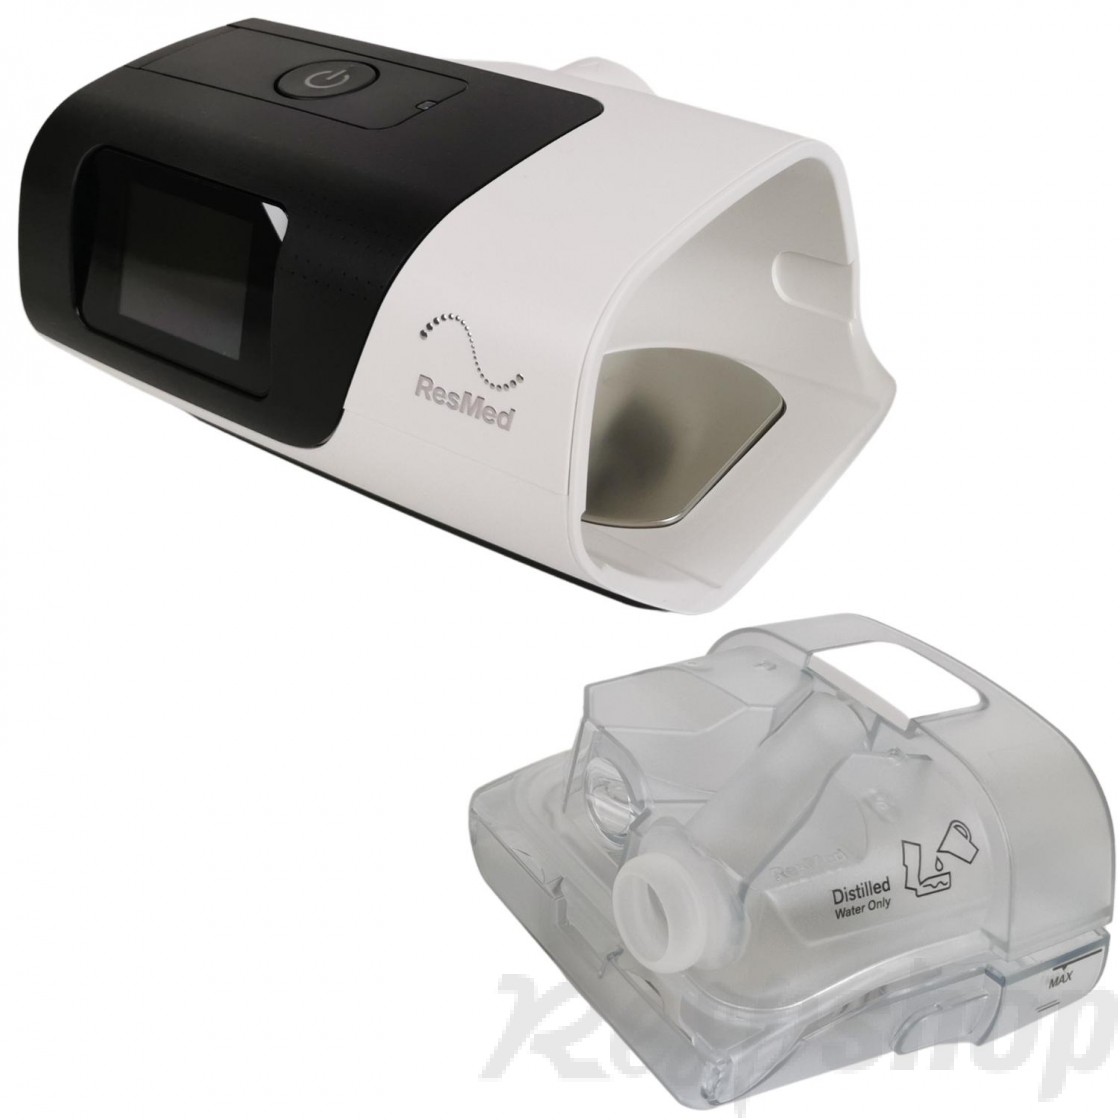
The humidifier tub has only a 6-month warranty, so it will be interesting to see if this design holds up against leaks in the long term. In terms of dimensions, with the humidifier installed, the AirSense is 3.7” tall by 10.2” wide, by 5.5” deep.
So it’s a little wider than most CPAPs, including the AirSense 10, but the overall footprint of the 11 is actually 24% smaller, and it is 10% lighter than the 10. So, when it comes to traveling, the 11 is a little more compact than previous versions.
AirSense 11 Exterior Features
Most of the exciting features of this unit are found internally, but there are a few exterior items to go over. Firstly, you’ll notice that there is a single button on the entire housing of the unit, which is a large button on the top.

Despite having a power symbol, this button is actually used to Start or Stop your therapy, not to power the device on or off (to do that, you just plug it in or out).
If this button ever flashes with a white light, then a system error has occurred. If this happens, refer to the troubleshooting section of your manual or give us a call.
On the rear side of the unit, you’ll find the outlet connector where the hose attaches to the device. The slight difference here from the AirSense 10 – on the 11 the hose attaches to the outlet connector straight on, not at a right angle.

That can be a pain if you like to keep your CPAP unit against the wall as you need more room behind the machine to allow the hose to bend away. And by the way, if you’d like a detailed comparison between AirSense 10 and 11, then read this article.
Close to the outlet connector is the air filter inlet cover, which houses the unit’s disposable filter.

ResMed’s marketing material for the unit says the air filter needs to be replaced every 6 months. But plenty of physicians and other manufacturers with similar disposable filters would recommend doing so much more frequently.
Resvent recommends every two weeks for the iBreeze, for example. Our recommendation is to change it whenever the filter starts to discolor or every month, whichever comes sooner. And if you have pets or a dusty home, then more frequently doesn’t hurt – you can’t replace the filter too regularly!
If we turn the device to the side, you’ll see the SD card cover, which contains a – you guessed it – SD card, which stores your sleep data!

Now, this is where the AirSense 11 separates itself from all other CPAP devices currently on the market and why you pay more for this machine.
And that comes down to the data this device collects, how it processes that data to personalize the experience for each user to maximize the chances of successful sleep therapy, and how this data is made accessible and understandable to the average consumer.
AirSense 11 Data & Connectivity Features
There’s no doubt we’re living in a more data-driven society than ever. People are increasingly interested in tracking medical therapy or even personal well-being when information is readily available in a digestible format.
We’ve seen this with the Fitbit and Apple watches – how simplified and gamified progress tracking is extremely motivational for success.
Well, this is what ResMed has been able to successfully incorporate into the AirSense! This device has both Bluetooth and cellular connectivity, which means a few things.
First, there’s myAir. This app and online portal wirelessly track a few basic metrics regarding your previous night’s sleep therapy and then provides the user an at-a-glance scorecard out of 100.
Then there’s Care Check-In which provides coaching and training where needed. It asks new users a series of setup questions when the device is first turned on and continues to ask further questions about the success of their therapy periodically throughout the first few months of use.
With your consent, these responses are made available to your care provider through AirView to give the provider a more complete picture of your therapy progress to maximize the chances of success.
That includes us here at RespShop. We offer far more than most eCommerce companies of CPAP equipment. We are not simply a distributor of products – we have a wealth of resources when it comes to medical staff who can help you with your sleep therapy.
We have respiratory therapists, polysomnographic techs, and a nurse on staff to assist customers, so we can also remotely view your sleep data on the AirSense 11 and control the device to adjust any of the Clinical menu settings as you may need.
The other way that ResMed uses the remote connectivity capabilities of the device is to send software updates to your machine without you needing to manually upgrade your device.
We really like this capability, but we can understand if some are wary of having things change for them once they are comfortable with what they have.
ResMed AirSense 11 Touch Screen Navigation
If you are already familiar with the AirSense line, you’ll also notice a fairly significant omission from the AirSense 11, and that is that ResMed has done away with the navigation knob. The device is now controlled entirely from the colored touchscreen.
The screen is sharp, and the colors are bright and appealing. It does respond well to touch, but the scrolling response time is certainly less than immediate, and it scrolls in preset amounts rather than the amount of motion you apply to the swipe.
Most of us are used to our smartphones that have a higher level of responsiveness, so that could be something to be improved on in later iterations. There is a light sensor built into the device, which adjusts the screen brightness according to the light level in the room.
The illuminated portion of the screen is quite small, but the menu is kept simple. From the home screen, you are presented with two main options: My Sleep View and My Options.
My Sleep View automatically generates a summary of your last therapy session when you wake up and press the Stop button. This is very similar to what we spoke about with the myAir app.
The “More” button includes options for your myAir app connectivity, such as the Airplane Mode and the Mask Fit Test, among others.
The ‘My Options‘ Menu on the AirSense 11
The bulk of the information and customization is found in the My Options menu, the first of which is Ramp Time. Here you can adjust the period of time that it takes for the pressure to slowly ramp up to the final prescribed amount in five-minute increments.
Traditionally, this ramping time begins from the onset of therapy, but ResMed has an AutoRamp feature. This allows the AirSense 11 to detect when the user has actually fallen asleep and only then does it begin to ramp up the pressure to the prescribed level.
This way, whether it takes you 5 or 50 minutes to drift off, the unit will deliver low starting pressure for maximum comfort the whole time. This feature was introduced on the AirSense 10 AutoSet device and is now a standard feature on all AirSense 11 models.
Another feature of note is Climate Control. When you purchase the AirSense 11, you have the option of spending an additional $40 or so to get the upgraded ClimateLineAir 11 tubing. This is well worth the extra cost – this is heated tubing that helps reduce CPAP side effects, such as rainout or dry mouth.
You can set your Climate Control to either Auto or Manual. When the Climate Control is set to Manual, the user sets the humidity level and tube temperature manually, which we’d only suggest playing with if the Auto settings are causing discomfort.
Bear in mind that the ClimateLineAir 11 is the only heated tube that is compatible with the device. And you can, of course, still control the humidifier settings, even without the ClimateLineAir 11 tubing.
AirSense 11 AutoSet Features
When it comes to auto settings, ResMed is currently the market leader. They use their AutoSet algorithm on their AutoSet model. This algorithm uses CSA and CSR detection, along with RERA reporting to make automatic adjustments for comfortable therapy throughout the night.
Here are the disordered sleep patterns that these acronyms stand for:
- CSA = Central Sleep Apnea
- CSR = Cheyne-Stokes Respiration
- RERA = Respiratory Effort-Related Arousal
This is a more complete approach to treating sleep apnea because sleep apnea is not a consistent condition. The amount of positive air pressure your body needs changes on a nightly basis and even on an hourly basis while you’re sleeping.
Perhaps you are especially tired, sleeping in a different position, or have a cold or other temporary sicknesses; or maybe it’s the weekend after you’ve had a big night out! Whatever it is, what you need out of your device for the best sleep possible is ever-changing.
So, having advanced algorithms that constantly monitor instances of sleep apnea, your breathing patterns, and the amount of airflow – and then calculate this data to deliver what you need at any given moment – is a huge factor that will impact the success of your sleep therapy and the quality of sleep you get.
That’s why most people will spend the extra for the AutoSet model and also why we’d recommend that for the most part, it’s best to leave settings in their auto mode.
That said, within the AutoSet mode you are able to choose a Soft or Standard response. Soft response means the device uses gentler pressure increases and decreases, whereas in Standard mode the unit will reach the intended pressure faster but you may notice the pressure changes a little stronger.
AirSense 11 AutoSet For Her Feature
With the release of the AirSense 11, ResMed has simplified its product line. They have done away with the For Her variant of their unit models, which is a welcome change.
Instead, you can find an AutoSet For Her option within the device menu of the AirSense 11 AutoSet, which we’ll get to in a bit. The AutoSet for Her mode is now simply a feature within the mode setting, as opposed to it being a standalone device.
Side note: the AirSense 11 Elite does also have these detection capabilities but is still only a manual CPAP device. These data points are for your physician to give them more information about your sleep patterns so they can better set your device to the optimum settings within the device’s parameters.
AirSense 11 Expiratory Pressure Relief
The last setting we’ll touch on is Expiratory Pressure Relief or EPR. This setting will drop the pressure of the unit as you breathe out, making it more comfortable to use. There are 3 levels to choose from, so experiment with these and see what you like best.
Using the ResMed AirSense 11
Now, let’s start the therapy. We press the “Start” button, and the unit itself is extremely quiet. It is rated at just 27 decibels, according to the manual. Once on, the unit will begin to heat the water in the humidifier.
If you ever want warm air straight from the start of therapy, then there is a Warmup option within the More settings of the menu, which will begin the heating process and display an appropriate icon. If you forget about this being on, then it will begin to cool down after 20 minutes.
As with all CPAP devices, there will be a range of information on the screen during therapy. We won’t go over all of it here, but feel free to get in touch if you have further questions about any of these or want to discuss your sleep therapy.
The unit itself comes with a 2-year warranty and 6-months on the supplied tubing and humidifier.
Once you stop your therapy session, wait at least 10 minutes for the heated humidifier to cool down before dumping out any remaining water. Daily refill the tub with distilled water for the next night of sleep. ResMed also recommends cleaning the humidifier tub weekly alongside your tubing and outlet connector.
To remove the outlet connector, first, slide out the humidifier, then press firmly on the tab inside the device and pull the connector through the outlet connector socket. Wash them in warm water with household dishwashing liquid, then rinse in water only and let them dry, out of direct sunlight.
If you purchased the ClimateLineAir 11, then make sure the tubing is completely dry as it has an electrical connection point to the unit. ResMed doesn’t mention this as a point of caution, but we wouldn’t want it too short on you!
Final Thoughts
The AirSense 11 from ResMed is already a big hit. And while some would argue that there is nothing groundbreaking about this latest release, we should not understate that the AirSense 11 quite clearly shows the path that ResMed is looking to take with its line of CPAPs.
It now looks and feels much more like a smart device, and advances to the internal algorithms, connectivity, and user experience are all important strides to take the CPAP industry further toward what we expect from modern tech devices, and that is a welcome approach.
Don’t forget to visit RespShop.com to view the pricing of the AirSense 11 and other CPAP devices and accessories. Let us know in the comments whether or not the AirSense 11 is going to be your next – or first – CPAP device.
ResMed AirSense 11 FAQ
- Can you use AirSense 11 without water?
- Yes. AirSense 11 will work without water in the humidifier. However, either the humidifier or the side cover has to be inserted into the device. In addition, you must go to the My Options menu and turn humidification off.
- Does ResMed AirSense 11 have a battery?
- The unit does not come with a battery but is compatible with some third-party batteries. The Airsense 11 can work with Zopec Voyage and the Zopec Explore.
- Does AirSense 11 have Bluetooth?
- Yes.
- What are the best masks that work with AirSense 11?
- All CPAP masks and machines work together, so a customer can choose any mask.
- Should I replace my AirSense 10 with this new 11?
- If you want better connectivity, built-in therapy coaching, OTA updates, and a smaller, more modern machine, then yes, perhaps you should consider getting the AirSense 11. Please refer to our full comparison between the AirSense 10 and 11.
- What is the main improvement from 10 to 11?
- Connectivity and smart features. See our full comparison here.
- What’s new with the 11 that 10 does not have?
- Touch screen navigation
- Integrated AutoSet For Her
- Bluetooth and Over-the-Air software updates
- Integrated Use Guidance (Care Check-in and Personal Therapy Assistant)